 Check out our next class. We are so excited to get together with friends and students and share in the creation of what are sure to become a holiday traditions.
 Saturday, December 7, 2013
Sunday, December 1, 2013
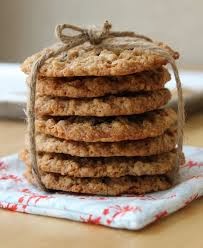
Not Your Grandma's Christmas Cookies
Back to UtensilsCookingSchool.com
Decorating the tree, picking out the perfect gift, listening to Christmas carols, building a gingerbread house, visiting Santa. Every family has traditions and those traditions are the things that make the holidays so wonderful. In our house, my mom was not the mom puttering around cranking out batch after batch of holiday treats. She did, however, have a recipe for simple spritz style butter cookies and it was always my job to split the candied cherries and put them on before the cookies went in to the oven. I still make these cookies every year. I make the first batch on Thanksgiving just like my mom. I love these cookies and will pass this tradition to my children. Of course, I have also created some of my own traditions with my family. I build a gingerbread house almost every year. Buche de Noel is always our Christmas Day dessert and on Christmas morning, French toast made with the sweet fruit bread, Panatone is always on the menu. So what if you want to create traditions in your own home but you don't have any baking experience?
 There are books on top of books and magazines by the mile chocked full of holiday cookie recipes. So where do you start? There are so many cookies, so many favors, so much technique....it can be overwhelming. In the end, you end up with a couple of batches of chocolate chip that might have some red and green M&M's in them. Hardly a show stopper!


Refrigerator Cookies-Sometimes called Slice and Bake Cookies, this dough is incredibly versatile while still being easy to make and use. This dough will be stiffer than drop cookie batter. Be sure not to over handle the dough or it will become tough. This type of dough can be made ahead of time and frozen. After the dough is blended roll dough into a log approximately 2-3" across and wrap tightly in plastic. Chill the dough for at least an hour before slicing and baking. To get nice consistent shapes, turn your log an eighth turn between each slice. The log of dough can be rolled in crushed candy, sprinkles, or nuts before slicing for a custom made batch.

Bar Cookies- This type of batter is another great choice for new bakers and children. It will be a loose to medium batter that can easily be spread or pressed into a sheet pan. It is a perfect choice for the cookies that you want to add fruit, nuts, granola of chips to. Just make sure to cut bars while they are still slightly warm. If cooled completely, they will be harder to cut in to neat squares.

 Shaped Cookies- Now we're getting to the bigger guns. Shaped cookies are the ones that are made by rolling dough out and cutting with cookie cutters like sugar cookies and gingerbread cookies or the dough is shaped by hand like almond crescents or rum balls. Shaped cookies are definitely one of the more time consuming cookies to make but they are fun to do with your kids. They can be iced simply by making a slightly more wet Royal Icing, hold the cookie face done and dip. Decorate with sugar, chips, candy while still wet and then dry on a baking wrack. The Royal Icing will dry hard. This is an easier technique than channel icing which requires that a bead of icing be piped along the edges and back filled with a looser icing.

Piped or Spritz Cookies-My mom's butter cookies are an example of this type of cookie. The dough is firm enough to hold it's shape when handled properly but is soft enough to be forced through a pastry bag or cookie press. I highly recommend an electric cookie press if you are going to add these to your arsenal. I discuss my favorite cookie gun in my post on small appliances. These doughs can be a very simple way to make cookies that look like they took a lot of effort. The one thing I will recommend for these in particular if not for all of the cookies, is to make sure the dough is chilled before piping. The cookies will hold a better shape and have a much nicer texture. I will discuss handling the ingredients in more detail below.

 Filled Cookies-The definition of filled cookies does vary but all are generally simple to make. Some are filled prior to baking like thumbprint cookies or filled after they are baked and cooled like macaroons and sandwich cookies. If you are assembling sandwich cookies with icing, make sure they are thoroughly cooled to keep icing from melting and running.

No Bake-These kinds of treats can be made quickly and are great when you need a last minute dish to bring to that party or bake sale. They almost all will require melting some sort of chocolate or making a granola based batter. As long as you have a fair understanding of how chocolate needs to be treated and how it behaves, these are a nice alternative when on a tight schedule.

No matter what kind of cookies you decide to tackle, there are some basic techniques that will guarantee a perfect end product. Here are a few good things to know.
Butter- Of course it is the best choice for cookies in terms of flavor and texture. If you notice that your cookies made with butter spread too much, it is likely caused by the dough being too warm. Butter has a very low melting point so if you use dough at room temperature, the butter in the oven becomes liquid almost immediately causing the dough to spread. For cookies with a nicer shape and better texture, chill dough for at least an hour before baking. Some people will go to shortening or margarine because the melting point is higher giving you the shape and texture that's desired. I say that there is no substitute for the taste and mouth feel of butter so take the time to chill the dough. Plus margarine is a very unhealthy choice in the end.

Sugar- Different sugars have different results. It is good to know what the differences are so you get just the results you are looking for. Brown sugar is simply white sugar blended with molasses. Other than the distinct taste that it brings to the cookie it also will add moisture back in to the dough creating a softer, more tender cookie. White sugar doesn't have the same depth of flavor but it does create lovely color and a crisp bite. There are a couple of things to know about honey if this is your chosen sweetener. First, it is sweeter than table sugar so you don't need to use much and second, it does add moisture to the dough so it will change the texture of the cookie when baked. A quick note about artificial sweeteners. Many of them like Sweet n Low and Equal and even Splenda cannot be used to cook or bake. When they reach high temperatures they change molecularly and become bitter. They also will pretty drastically change the texture. I will be honest. I have not tried to bake with some of the newer sweeteners like Stevia, Monk fruit, and agave so I really don't now how they will change the recipe.

Eggs- This is a natural leavening agent. Air is beaten into the eggs and as a result require no other leavening agent in recipes like sponge cakes and souffles. If eggs are over beaten in cookie dough it will give your cookies a caky texture which in most cases is not the desired result. I have also found that fresh farm eggs do not work as well as pasteurized eggs in baked goods. Fresh eggs are higher in protein and fat and I find that the baked goods can often be tough. So save those for a yummy omelet!

Leavening- These ingredients are where the chemistry of baking comes in. There are several ways to create rise in baked goods. As I mentioned earlier, eggs can be used alone or with other leavening to make lovely tender sponge cake. Most cookies either use baking soda or baking powder or both to do the job. I won't bore you with the chemistry of it all but I think it is good to have an idea of what each one does and where they apply. Baking Soda is an alkaline. It neutralized acid so this is the agent you will see in products that have acidic ingredients like citrus, molasses and even cocoa powder (who knew!) while baking powder is used in doughs that have no real acidic ingredients. They are not interchangeable and be careful to not overuse baking powder. It has a strong browning ability but if too much is used the cookies will taste bitter and metallic.

Flavoring-This is where the fun begins! When it comes to flavoring the dough itself, extracts or essence oils work the best. Use them sparingly. If it is a different extract than the recipe calls for, add a small amount, taste and adjust accordingly. Be very careful of almond extract. It is extremely strong and will give your cookies a medicinal taste if over done. The same can be said for peppermint and anise but don't be afraid to experiment to find what you like the best. A good way to add a pop of flavor along with extract is with citrus zest. Zest releases the lovely oils that exist naturally in the fruit's skin and won't change the texture. I find a Microplane works best for a fine fragrant zest. I discuss them a bit more in my previous post covering kitchen gadgets. Be sure you only take off the COLORED part of the peel. The pith, or the white part, is very bitter. If you want to use fruit juices as flavoring be sure to substitute another liquid ingredient. Adding it on top of the already added liquid will change the texture sometimes dramatically. Add in ingredients are pretty much the sky's the limit. You can add, substitute or omit add ins like chips nuts, dried fruit or candy. I am a huge fan of dried cranberries with dark chocolate chips or crunchy salty pistachios If you want to add in fruit that isn't dried such as pineapple or apples, you may have to increase your flour a bit. The additional moisture will upset the delicate balance but with a little experimenting you can get just the end product that you like.


Decorating the tree, picking out the perfect gift, listening to Christmas carols, building a gingerbread house, visiting Santa. Every family has traditions and those traditions are the things that make the holidays so wonderful. In our house, my mom was not the mom puttering around cranking out batch after batch of holiday treats. She did, however, have a recipe for simple spritz style butter cookies and it was always my job to split the candied cherries and put them on before the cookies went in to the oven. I still make these cookies every year. I make the first batch on Thanksgiving just like my mom. I love these cookies and will pass this tradition to my children. Of course, I have also created some of my own traditions with my family. I build a gingerbread house almost every year. Buche de Noel is always our Christmas Day dessert and on Christmas morning, French toast made with the sweet fruit bread, Panatone is always on the menu. So what if you want to create traditions in your own home but you don't have any baking experience?
 There are books on top of books and magazines by the mile chocked full of holiday cookie recipes. So where do you start? There are so many cookies, so many favors, so much technique....it can be overwhelming. In the end, you end up with a couple of batches of chocolate chip that might have some red and green M&M's in them. Hardly a show stopper!
Even though it seems like there are a million recipes and a million techniques, in reality there are merely a few techniques that can be made with different ingredients to give you a huge fanciful array of Christmas treats! Get a handle on the basics and the sky's the limit! Here are some of the basic techniques and some great varieties of each.
Drop Cookies- I started with this one because it is the easiest so even your young bakers can turn out yummy cookies. Drop cookies are made from a soft, fairly wet but stiff batter. They result in a free form irregular shape. Some examples of drop cookies are the ever popular chocolate chip, oatmeal, and peanut butter cookies. Use a small to medium spring loaded scoop to portion your batter. That way all of your cookies will be uniform in shape and size and will cook more consistently.

Refrigerator Cookies-Sometimes called Slice and Bake Cookies, this dough is incredibly versatile while still being easy to make and use. This dough will be stiffer than drop cookie batter. Be sure not to over handle the dough or it will become tough. This type of dough can be made ahead of time and frozen. After the dough is blended roll dough into a log approximately 2-3" across and wrap tightly in plastic. Chill the dough for at least an hour before slicing and baking. To get nice consistent shapes, turn your log an eighth turn between each slice. The log of dough can be rolled in crushed candy, sprinkles, or nuts before slicing for a custom made batch.

Bar Cookies- This type of batter is another great choice for new bakers and children. It will be a loose to medium batter that can easily be spread or pressed into a sheet pan. It is a perfect choice for the cookies that you want to add fruit, nuts, granola of chips to. Just make sure to cut bars while they are still slightly warm. If cooled completely, they will be harder to cut in to neat squares.

 Shaped Cookies- Now we're getting to the bigger guns. Shaped cookies are the ones that are made by rolling dough out and cutting with cookie cutters like sugar cookies and gingerbread cookies or the dough is shaped by hand like almond crescents or rum balls. Shaped cookies are definitely one of the more time consuming cookies to make but they are fun to do with your kids. They can be iced simply by making a slightly more wet Royal Icing, hold the cookie face done and dip. Decorate with sugar, chips, candy while still wet and then dry on a baking wrack. The Royal Icing will dry hard. This is an easier technique than channel icing which requires that a bead of icing be piped along the edges and back filled with a looser icing.
Piped or Spritz Cookies-My mom's butter cookies are an example of this type of cookie. The dough is firm enough to hold it's shape when handled properly but is soft enough to be forced through a pastry bag or cookie press. I highly recommend an electric cookie press if you are going to add these to your arsenal. I discuss my favorite cookie gun in my post on small appliances. These doughs can be a very simple way to make cookies that look like they took a lot of effort. The one thing I will recommend for these in particular if not for all of the cookies, is to make sure the dough is chilled before piping. The cookies will hold a better shape and have a much nicer texture. I will discuss handling the ingredients in more detail below.
 Filled Cookies-The definition of filled cookies does vary but all are generally simple to make. Some are filled prior to baking like thumbprint cookies or filled after they are baked and cooled like macaroons and sandwich cookies. If you are assembling sandwich cookies with icing, make sure they are thoroughly cooled to keep icing from melting and running.
No Bake-These kinds of treats can be made quickly and are great when you need a last minute dish to bring to that party or bake sale. They almost all will require melting some sort of chocolate or making a granola based batter. As long as you have a fair understanding of how chocolate needs to be treated and how it behaves, these are a nice alternative when on a tight schedule.

No matter what kind of cookies you decide to tackle, there are some basic techniques that will guarantee a perfect end product. Here are a few good things to know.
Butter- Of course it is the best choice for cookies in terms of flavor and texture. If you notice that your cookies made with butter spread too much, it is likely caused by the dough being too warm. Butter has a very low melting point so if you use dough at room temperature, the butter in the oven becomes liquid almost immediately causing the dough to spread. For cookies with a nicer shape and better texture, chill dough for at least an hour before baking. Some people will go to shortening or margarine because the melting point is higher giving you the shape and texture that's desired. I say that there is no substitute for the taste and mouth feel of butter so take the time to chill the dough. Plus margarine is a very unhealthy choice in the end.

Sugar- Different sugars have different results. It is good to know what the differences are so you get just the results you are looking for. Brown sugar is simply white sugar blended with molasses. Other than the distinct taste that it brings to the cookie it also will add moisture back in to the dough creating a softer, more tender cookie. White sugar doesn't have the same depth of flavor but it does create lovely color and a crisp bite. There are a couple of things to know about honey if this is your chosen sweetener. First, it is sweeter than table sugar so you don't need to use much and second, it does add moisture to the dough so it will change the texture of the cookie when baked. A quick note about artificial sweeteners. Many of them like Sweet n Low and Equal and even Splenda cannot be used to cook or bake. When they reach high temperatures they change molecularly and become bitter. They also will pretty drastically change the texture. I will be honest. I have not tried to bake with some of the newer sweeteners like Stevia, Monk fruit, and agave so I really don't now how they will change the recipe.

Eggs- This is a natural leavening agent. Air is beaten into the eggs and as a result require no other leavening agent in recipes like sponge cakes and souffles. If eggs are over beaten in cookie dough it will give your cookies a caky texture which in most cases is not the desired result. I have also found that fresh farm eggs do not work as well as pasteurized eggs in baked goods. Fresh eggs are higher in protein and fat and I find that the baked goods can often be tough. So save those for a yummy omelet!

Leavening- These ingredients are where the chemistry of baking comes in. There are several ways to create rise in baked goods. As I mentioned earlier, eggs can be used alone or with other leavening to make lovely tender sponge cake. Most cookies either use baking soda or baking powder or both to do the job. I won't bore you with the chemistry of it all but I think it is good to have an idea of what each one does and where they apply. Baking Soda is an alkaline. It neutralized acid so this is the agent you will see in products that have acidic ingredients like citrus, molasses and even cocoa powder (who knew!) while baking powder is used in doughs that have no real acidic ingredients. They are not interchangeable and be careful to not overuse baking powder. It has a strong browning ability but if too much is used the cookies will taste bitter and metallic.
Flavoring-This is where the fun begins! When it comes to flavoring the dough itself, extracts or essence oils work the best. Use them sparingly. If it is a different extract than the recipe calls for, add a small amount, taste and adjust accordingly. Be very careful of almond extract. It is extremely strong and will give your cookies a medicinal taste if over done. The same can be said for peppermint and anise but don't be afraid to experiment to find what you like the best. A good way to add a pop of flavor along with extract is with citrus zest. Zest releases the lovely oils that exist naturally in the fruit's skin and won't change the texture. I find a Microplane works best for a fine fragrant zest. I discuss them a bit more in my previous post covering kitchen gadgets. Be sure you only take off the COLORED part of the peel. The pith, or the white part, is very bitter. If you want to use fruit juices as flavoring be sure to substitute another liquid ingredient. Adding it on top of the already added liquid will change the texture sometimes dramatically. Add in ingredients are pretty much the sky's the limit. You can add, substitute or omit add ins like chips nuts, dried fruit or candy. I am a huge fan of dried cranberries with dark chocolate chips or crunchy salty pistachios If you want to add in fruit that isn't dried such as pineapple or apples, you may have to increase your flour a bit. The additional moisture will upset the delicate balance but with a little experimenting you can get just the end product that you like.

Whether baking with my kids or by myself, I have always taken great joy in the process. I have baked many, many, many types of cookies. ( I get bored easily) I have built a scratch gingerbread house almost every year since I was 17 years old. I have baked and sold hundreds of holiday pies and made and decorated wedding cakes, including my own. I have even gone through the process of mastering some french pastry techniques. Although baking is a much more exact scientific process, I love that I can be wildly creative and experiment with so many different combinations of technique and flavors. So I hope this holiday season you will feel inspired and bake with confidence. Please feel free to post the results of your baking adventures here. We love to see what you are up too
Have a wonderful holiday season and try something new to leave for Santa. He is so over chocolate chip. I am sure that if you left him something more creative and delicious there might just be an extra gift under the tree for you!
And please visit and like us on facebook. That's where you can find out all about upcoming classes, see some great pictures of our cooking classes, or just come by to say hi!
Simply search Utensils Cooking School to find us!!!
And please visit and like us on facebook. That's where you can find out all about upcoming classes, see some great pictures of our cooking classes, or just come by to say hi!
Simply search Utensils Cooking School to find us!!!

Monday, November 25, 2013
Our Favorite Foodie Gifts- small appliances
I am so excited to share my favorite small appliances. I don't have too many, frankly, but there are a couple that are essential that I just love. I try to weigh the usefulness of the tool against the amount of time it takes to set up and clean up. I will use a small appliance if it greatly cuts down my cooking time but not if it is a nuisance to put together, break down and clean.
There are a couple that we won't talk about here because their usefulness goes without saying and they are things that most everybody has. I think it is safe to say that most people have an electric can opener, some form of automatic coffee maker, a blender and a toaster so we will skip over those and move in to the cooler stuff.


 |
| Fresh soda at your fingertips just the way you like it |
Another one of my staples in my kitchen is a stand mixer. My mom used a hand held beater when I was a kid but as I took up cooking I found that standing there and holding the beater was not the best use of my time. With a stand mixer, you can put the ingredients in, turn it on and go on to another task while it mixes. I love the popular Kitchenaid Stand Mixer. I got mine in 1987 and it still works like a champ. The only thing I've had to replace was the beater attachment and the paddle attachment and that was 3 years ago. There are a bunch of cool accessories that can be attached to make it more versatile. I have a meat grinder and sausage extruder but there are pasta makers, juicers, all kinds of neat attachments. Oh, and they now come in really really cool colors. The thing that is most notable is that the basic model was about $290 when I got mine in 1987 and they run about the same now. Totally worth the investment!
 |
| One of the most versatile appliances in the kitchen. Worth the investment |
Now stand mixers aren't always the best tool for the blending job. When you need to blend soups and sauces, using a traditional blender makes more dishes to be washed and can be dangerous if blending them hot. The better and safer tool for this type of job is a wand blender, sometimes called an immersion blender. This little guy has a long thin body and small, very sharp, very fast blades. Sauces and soups will be smooth as silk in seconds. They are very heat resistant and easy to clean. They are also light weight and easy to store, much easier than a blender. I use mine all the time for pureeing soups right in the 2 gallon pot.

With the holidays fast approachingI felt it was only fair that I mention the electric cookie gun. My mom made the best butter cookies ever when I was young but it was pretty laborious with a hand press. My mother in law had a yard sale way back in the early 90's where I found an electric cookie press. It was clearly a model from the late 60's early 70's judging by the artwork on the box. I used that cookie gun to bang out 4 dozen of my mom's butter cookies in a matter of 10 minutes, a huge improvement over hand cranking them out. That same gun finally gave out last year and needed to be replaced. It made it through 30 years of cookies! It's not limited to cookies either. It works great for filling deviled egg, making canopies and hors douvres. The down side is that they are a bit messy to refill and they have a lot of parts to be cleaned but I throw all the parts except the body right in the dishwasher.

There is nothing better than beautiful freshly made pasta. It is versatile and the dough is actually fairly easy to make once you understand the basics. I have a traditional hand crank pasta maker but when Rob moved in he brought something that I immediately fell in love with. I give you the Pasta Extruder. I didn't believe it when he told me that it makes perfect consistent pasta and all you have to do is throw the ingredients in and turn it on. They, too, are a bit of a nuisance to clean but I think it is totally worth the effort for great fresh pasta once in a while.

Again, I thought that covering blenders was not really necessary but I will make this point. Try to get a machine that has a blender attachment and a food processor attachment. That way you are only storing one base.
Finally, this is not an electric appliance and in fact it will probably not sit on the counter. I just felt like I needed to share this as it has become one of my favorite tools. This will make the most wonderful mashed potatoes and cal be used to make applesauce and tomato sauce among other things. A food mill is a manual tool but it isn't difficult to use and the results are well worth it. If you can find a gallon bucket, the mill will sit right on top so your product will fall right in to the bucket.

There are so many more small appliances out there. Picking one as a gift can be overwhelming but if you pick one that is multipurpose and doesn't take longer to set up than it does to do what you need it to do, that should narrow the field a bit. I have become a convert of the crock pot especially for entertaining. They are great for holding soups, sauces and proteins at a constant temperature. I rarely do the whole throw stuff in in the morning and leave it all day thing. I usually prepare it on the stove and finish it in the crock pot but still, a valuable tool.
I have found that over the years as my knife skills improved, I had much less use for too many electric appliances. There are always going to be jobs that just can't be done by hand and some that can but just take too long. (Try whipping cream with a bowl and hand whisk). Using a machine to do the work is just fine. It doesn't make you any less of a cook. In fact, in the restaurant world, if we can find something that does the job in a hurry, we are all over that!
I have listed all of my picks within the blog so you can order them and start cooking in no time.
Friday, November 22, 2013
Our Favorite Foodie Gifts-small gadgets
With Christmas and Hannukah around the corner, we know that trying to find the perfect gift for your foodie friends and family can be daunting. There are so many gadgets for all levels of cook. It's hard to know where to begin. So I thought I would run down the list of things we love, things we don't, and best of all, you can order them right from here and get them in plenty of time for gift giving!
I thought I would start with my favorite every day hand tools. The stores are full of little gadgets and trinkets to do all sorts of things in the kitchen but pros know that the less tools to do the most jobs is the way to go. Most chefs carry their own tools in to their kitchens and most kits will have variations of the following tools.
 |
| I personally LOVE this kit available through chefystore.com |
Knife Steel
Chef's knife
Boning knife
Pairing knife
Utility knife
Tongs
Peeler
Microplane
Kitchen sheers
Pastry brush
Board scraper
Meat thermometer
All Purpose tool
Black Sharpie Markers
I will cover knives and steels in a later post. Today I just want to cover the other tools on the list.
Again, you will stand in the hand tool department of your favorite store and see all kinds of tools. Here is my general rule of thumb. If you can only use it for 1 task, it isn't worth buying. I know some would disagree but if you have great tools that can meet several needs, you will save yourself endless amounts of money, time and clean up. That being said, let's go over the ones on my list. For your convenience I have included links to almost all of my favorites below so gift getting is even easier.
Knife Steel-a long metal rod that has a slightly textured surface used to smooth the fine edge of the
blade of your knives. Pulling an edge up does take a bit of practice and people have techniques for using them. I was told by a chef that I used to work for that it should sound maniacal. So get your Jason on and keep knife edges sharp. Steels will wear out eventually. You can tell because the slightly rough texture will be gone and the steel will feel smooth to touch.
Tongs-the most used tool on any dinner line, your tongs tackle a variety of chores. I use them to stir, to grab hot pans from the oven, to flip food over in a pan, and to handle hot food items. They come in different lengths but I prefer the longest ones so my hands are further away from the heat. Many have a tension spring that will keep them open until you squeeze them shut. Many of them also have a small tab at the end to lock them closed. Being able to close them is essential for storage and to keep them under control when you put them down on your work surface. I have arthritis in my hands so for me to work against a tension spring for 8-10 hours a day is impossible. I love these long tongs from Oneida. They have a directional locking mechanism that allows you to open and close them with one hand. You may prefer rubber grips on the handles but we find wrapping them with a towel works as well.
 |
| Rubber bands make picking up slippery dishes a breeze |
*HINT- save the thick small rubber bands from broccoli and asparagus. Put one on each end of the tong heads if you need to grab small dishes such as ramekins to keep them from slipping through the tongs.
Peeler-again an essential part of any tool kit. Without a peeler, preparing your mis en place is next to impossible. You want to make sure that your peeler is very sharp and well balanced. The Titan peeler came about as an "As Seen on TV" product that I ran across years ago in a local pharmacy ( believe it or not). They have a horizontal blade as apposed to the traditional vertical ones. They are remarkably sharp AND they work in two directions. With a little practice, you will be able to rip through a ten pound bag of potatoes in nothing flat! The added bonus of this product is that it comes with a second tool for making very fine julianne strips. It creates a fine dice that the chef with great knife skills would not even be able to produce. It comes apart for easy cleaning and is dishwasher safe.
 |
| Titan peelers always come with this great julianne tool. Perfect for making garnishes |
*HINT-Use a peeler to clean everything from carrots and potatoes to pineapple and turnips to minimize your waste. This Titan peeler will peel everything including pineapple, celery root, and cantaloupe. It really is an amazing little work horse.
Microplane-I have come to love this tool and am pleasantly surprised at all of the jobs it can take on. They are a great alternative to a box grater because they allow you to grate the product right in to the pan or bowl. They will finely grate everything-hard cheeses, citrus zest, chocolate nutmeg, horseradish. If a larger shred is desired you might want to stick to the traditional box grater but for finely grated product you can't beat the efficiency of the microplane.
 |
| Great for grating whole nutmeg. Try it on warm eggnog!!! |
*HINT-Keep an old toothbrush near your sink to scrub the microplane safely without cutting your fingers
Kitchen Sheers-a heavy duty pair of very sharp scissors are critical in every kitchen. They make cutting through hard products like poultry carcasses, shellfish, and produce like artichokes. Things like these can be cut with a knife but it is hard on your knives and sheers give you more control so that it doesn't damage the meat or slip, causing serious injury. Be sure to get 2 pairs so that one can be used exclusively for proteins and you don't cross contaminate your produce and other products.
 |
| Sheers make cutting shell fish and poultry with more control than a knife. |
Pastry Brush-I'll keep this simple. I have used a1-2 inch china bristol brush that you can get in any hardware or art supply store for under $2. They can go straight in to the dishwasher. If you find it gets to difficult to clean just throw it away and buy a new one.
Board Scraper-often called a dough cutter, this is a flat rectangular metal blade with either a metal or wooden handle. These can often be seen in pizza places or bakeries. It is ideal for portioning soft product like bread or pizza dough. I, however, use it more frequently to keep my work surface clean. It will sweep up any debris left behind on
your board like a dustpan. It also makes a great scoop to pick up and move product from board to pot or bowl. It has a larger capacity than your hands minimizing your movements. Any tool that makes you more efficient and minimizes movement is essential to being a great cook.
 |
| great for cutting soft dough but also essential for keeping a nice lean station |
*HINT-pizza dough is widely available in the refrigerator case of the grocery store. Cut it in to small 2" pieces with your board scraper and use to make fresh garlic knots or homemade monkey bread in a snap.
Meat Thermometer-a MUST MUST MUST have! There should be several of them throughout your kitchen and out by the grill. Cooking meat to the proper temperature not only makes it safe to eat but also pulls the best flavor out of it. There are a lot of choices out there from digital probe thermometer to traditional dial thermometers. The probe thermometers are great because you can insert the probe in to the meat while still in the oven leaving the temperature display outside for easy monitoring. That being said, they can be pricey and are fairly fragile. ( a friend of mine told me recently during class that her husband had left their brand new $139 digital probe outside by the grill where it got rained on and never worked again). We use thermometers so frequently in the restaurant that we tend to lean towards the inexpensive dial type. They are exposed to insane heat, get dropped, thrown away, and lost. I do, however, like a small digital thermometer for home use because the temperature is displayed clearly and quickly.

All Purpose Tool-these little helpers are great for a variety of jobs that you might not do too often. They are great for pulling pin bones from fish, uncorking or unscrewing bottle tops that are stuck, punching wholes and so on. They fold up in to a compact shape which makes them easy to store.
 |
| Pin bones can ruin a fabulous piece of fish so feel for them several times. They are easy to miss |
Black Sharpie Markers-I know this seems like a silly tool to mention but it really is something that you should have several of in your utility drawer or knife kit and the reason is simple. EVERYTHING that gets wrapped up and stored in either the fridge or the freezer needs to be marked with what it is and a date. That way there is no risk of serving unsafe food. Sharpie markers are permanent enough to mark containers but will still wash off of containers with hot soapy water. They also have considerably less odor than many other permanent markers.
*HINT-these make great stocking stuffers and can be combined with a roll of white sticky labels.
 Of course there are a few more tools that I use for specific preparations, particularly baking and making garnishes. Outside of e obvious measuring cups and spoons, ( I am particularly fond of this measuring spoon. It has several measurements in one reducing the clutter and is easy to use and dishwasher safe)it's is a good idea to have a couple of different number scoops to control portions, a fluting tool that creates the frilly edges seen in lattice pies and raviolis, an offset spatula that will make icing baked goods much easier, a rubber spatula so that bowls and pots can be scraped clean minimizing waste, a wire whisk ( I actually have 3 ) and disposable pastry bags so you don't have to try to disassemble a cloth bag and try to wrestle the tip out of it. A note on that, you will often see a small white threaded cuff and nut sold along side pastry bag tips. YOU NEVER NEED TO USE THEM. Just cut a small hole in the end of the bag. Drop the tip inside until the end pokes out of the bottom. The pressure applied when piping will hold the tip in place. the cuff and nut set ups are difficult to get out of the pastry bags and seem to always be getting lost.
So what about all of the other bivits and gadgets that line the walls of the kitchen tool section of the store? There are very few that a feel like I absolutely must have. I have listed a few commonly purchased tools that serve only one purpose and aren't worth the effort to clean them.
Garlic press-use your chef's knife laying it flat blade away from you and give it a good hard smack with the heel of your hand.
Reamer- a small egg shaped wooden tool with a handle used for juicing citrus. hold the fruit in your palm over the pan to catch seeds and use a spoon inserted in the center to help press the juice out.
Knife sharpener-just don't do it. If you invest in good knives, the minute you pull it through that sharpener it will be ruined. Use a steel to pull up your edge on your knife and depending on how often you use them, send them out once or twice a year to be professionally sharpened.
 |
| These sharpeners will shorten the life of your knives |
 |
| Garlic presses are hard to keep clean and you waste a lot of time peeling and pressing each clove |
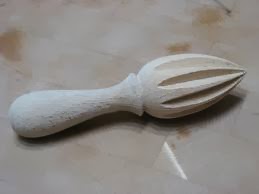 |
| Nothing that can't be done with a spoon handle and a good squeeze
Have fun shopping for your foodie. After all if they have the tools needed to make their cooking tasks easier, you will reap the benefits!
I have provided links for al of my favorite products. I chose these brands and types based on my own experiences. Tomorrow I will show you my favorite countertop electric gadgets. There are some great ones out there that will give you results like a pro!!! |
Wednesday, November 20, 2013
Slamming Yam Pancakes
Turkey, stuffing, mashed potatoes, yams with marshmallows, green bean casserole, pumpkin pie.............zzzzzzz. I know there are millions of people that will be preparing this menu a week from tomorrow, Thanksgiving day. I get it. Millions love these somewhat dusty uninspired dishes. They are tradition. They are safe and comforting and all that.

 I give you sweet potato ( or yam) latke. Latke are traditionally a crispy potato pancake made from white potatoes. Serve them with the traditional garnishes, a dollop of sour cream and some lovely bright applesauce. Your guests will go nuts for these and they are easier and healthier than you think when you follow recipe #2 below.
 Peel and shred sweet potatoes. I use a box grater but a food processor will work fine too. Keep them submerged in cold water until just before ready to prepare. Dice onion to a fine dice. Drain and squeeze the water out of the sweet potatoes with a paper towel and combine with onion, egg whites, salt and pepper. In a large frying pan, heat oil to 375 degrees. Press a ball of potato mixture about the size of a golf ball flat and gently drop in to oil. Do not over crowd the pan or the pancakes will steam more than fry and will not be as crispy or brown. Cook for about 3 minutes per side and then drain on some paper towels. Serve with sour cream and apple sauce.

I dig that. I grew up with it too. My mom was not much of a creative force in the kitchen. She was always perfectly happy to head right to these go to dishes. I, however, am not that girl. In fact, I am not a huge turkey fan. The thought of drowning those perfectly harmless green beans in canned soup makes me a little misty and, well, marshmallows on sweet potatoes??????
I am always looking for new ways to spin those traditional dishes so they are fresh and new but still maintain the traditional profile. I have made acorn squash stuffed with sausage with a maple glaze instead of yams. I have swapped celery root or parsnips for the plain old mashed white potatoes. And have grilled my green beans, saving them from the undignified mushroom soup death!
I will be honest. I do not like sweet potatoes (or yams. they are different vegetables but have very similar flavors. Yams tend to be more yellow while sweet potatoes are more orange) in spite of my gigantic sweet tooth. I'm not crazy about the texture and they are simply too sweet for me and the idea of putting more coyly sweet marshmallows on top........yikes. Years ago I decided to tackle the sweet potato makeover and the result was such a huge success that my family and friends expect nothing less at the Thanksgiving table.
 I give you sweet potato ( or yam) latke. Latke are traditionally a crispy potato pancake made from white potatoes. Serve them with the traditional garnishes, a dollop of sour cream and some lovely bright applesauce. Your guests will go nuts for these and they are easier and healthier than you think when you follow recipe #2 below.
Sweet Potato Latke #1
Serves 6
4 large sweet potatoes or yams
1 medium onion
3-4 egg whites
Salt and pepper
Sour cream and unsweetened applesauce for garnish
Peanut or Canola oil for frying.

Sweet Potato Latke #2 (you will need an electric waffle iron)
Serves 6
These will not be quite as crispy as the ones fried in oil. However, they do have considerably fewer calories and they can be done more easily while you do other things because they do not require your undivided attention.

Heat waffle iron then spray thoroughly with non stick cooking spray. Prepare potatoes as in the previous recipe. Press a layer of sweet potato mixture into waffle iron and close. Cook until pancake is golden brown outside and tender inside. ( my iron took about 15 minutes on high but it is old. You may have to experiment a bit with your own) Divide in to 4 pancakes. Serve with apple sauce and sour cream.
These can be made slightly ahead of time and kept warm in the oven until ready to serve. However, do not make too far in advance or they will get soggy.
Please visit Utensils Cooking School on facebook to see upcoming class schedule, grab some great tips, and see pictures from past classes.
Follow our blog for informative articles, product and cook book reviews, recipes and fun ideas for parties and entertaining.
Please visit Utensils Cooking School on facebook to see upcoming class schedule, grab some great tips, and see pictures from past classes.
Follow our blog for informative articles, product and cook book reviews, recipes and fun ideas for parties and entertaining.
Tuesday, November 19, 2013
it's like sex...If you don't love cooking you are doing it wrong..
It's Like Sex. If You Don't Love to Cook, You Aren't Doing It Right.
After all, we aren't born knowing how to either of them, are we? Of course, with a little time, patience and practice anyone can learn to be quite good at both! And when you are doing either of them for someone you love it shows!

Just like our first real kiss, first hand to hold, or first really intimate touch, our first experience cooking can be scary and intimidating. The fact is, it may not go so well but that doesn't mean that with some experience you can't become a great cook. It just takes patience, practice and understanding some of the basics.

 Thanks to our ever expanding media and pioneers in the cooking show world like Graham Kerr, Julia Childs and Emeril Lagasse, the average person has access to a wide variety of cuisines, techniques and cooking styles. The food looks amazing and the TV chefs make it look like a breeze in just 30 minutes. So off you go to the store trying to gather ingredients that you've never heard of and have a hard time finding. You take them home and lay them out on the counter and wonder where to begin. They make it look so easy and what where they doing while the commercials were on? How hard could it be? So you fumble through the recipe that you down loaded off of the internet. It comes out ok but seems like so much work for what is a bit of an anticlimactic end. Where did you go wrong? Why doesn't the food you cook come out as amazing as it does in the restaurants or on TV? Why does a recipe come out perfect one time and terrible the next? This kind of frustration can be the thing that keeps us out of the kitchen completely.
 The answer is simple. You don't have the basic foundation of cooking. The basic foundation of food preparation gives you the much needed information that allows you to not only successfully following a recipe but to also create terrific food with no recipe at all. Many of us had Home Economics classes in Junior High School and High School. There the teacher would show the students the basics of cooking, boiling an egg, making cookies, spaghetti and meatballs. I have very distinct memories of the things we made and still use some of those basic techniques today.
You may ask yourself why learning to cook seems so overwhelming to us today and yet was something that every woman learned to do 50 years ago before reaching adulthood. The answer is simple. We don't cook anymore. 50 years ago girls learned to cook because they watched their mothers and grandmothers do it from the time they were small. There is a lot to learn, no doubt and if you never saw your mom or dad make anything else but chicken nuggets in the microwave or mac and cheese from a box, it is certainly going to seem overwhelming!
But fear not. You can not only still learn to cook but also learn to LOVE to cook. I guarantee that as you grow in your food preparation skills you will find more and more satisfaction with every obstacle that you tackle. You will soon come to see that food is one of the greatest connectors to each other. You will see that food is a language that breaks down age barriers, gender barriers and class barriers! Good food is good food plain and simple and if you can create it and provide it, it will bring all sorts of people in to your life and connect you with them.
Don't misunderstand me. I know people are busy. I know you don't feel like spending 2 hours in the kitchen after working all day. In fact if you ask most chefs, they will tell you that when THEY get home they eat a bowl of cereal or a yogurt for dinner when they get home. I am certainly not so unrealistic as to think that people today will give up all of the conveniences of chain restaurants, fast food restaurants, and microwaves. All I'm saying is why not take a day a week or a even a day a month, gather your kids, your spouses, or even a couple of friends and indulge in some real time cooking.
 That is where we come in. Here at Utensils Cooking School, are passionate foodies. I have worked in the industry for 30 years and my husband and best sous chef is a foodie who loves to share the great taste and the experience of making food but we do realize that it can be too overwhelming to take on. In the weeks and months to come, we would like to here from you. Follow our blog and we are going to start a special section on cooking basics. We want to hear your questions about the very base part of cooking that you never really understood. Post them here and we will address them as thoroughly possible and we will give you the tools and needed confidence to give it a try on your own.
In a class I taught recently, the students were so surprised to see me seasoning my food several times throughout the cooking process with salt and pepper. As I salted and resalted, they cried out in horror but when it was all said and done, they understood that salting your food throughout the cooking process is what gives it the wonderful depth of flavors that they were experiencing out in restaurants but were unable to replicate at home.
 So go ahead and ask away. Think outside the box. What is your favorite food to go out for? What have you always wanted to know how to make but never thought you could? Homemade pasta? A souffle? How about a perfect omelet? How about amazing seafood? Empanadas! The perfect pie! Let's start talking food!

We are getting our January schedule together and it looks like it's going to be a blast. We have put together some great classes to get you ready for the festivities that come in February!
The Superbowl/ Tailgate Party
A Romantic Intimate Valentine's Dinner
A Singles Night Out
Please check out our Facebook page for class schedules, cooking tips and pictures from previous classes. Please like us on Facebook and follow us here on our blog to keep in touch with us!
https://www.facebook.com/pages/Utensils-Cooking-School/175892409271467?ref=profile

 Thanks to our ever expanding media and pioneers in the cooking show world like Graham Kerr, Julia Childs and Emeril Lagasse, the average person has access to a wide variety of cuisines, techniques and cooking styles. The food looks amazing and the TV chefs make it look like a breeze in just 30 minutes. So off you go to the store trying to gather ingredients that you've never heard of and have a hard time finding. You take them home and lay them out on the counter and wonder where to begin. They make it look so easy and what where they doing while the commercials were on? How hard could it be? So you fumble through the recipe that you down loaded off of the internet. It comes out ok but seems like so much work for what is a bit of an anticlimactic end. Where did you go wrong? Why doesn't the food you cook come out as amazing as it does in the restaurants or on TV? Why does a recipe come out perfect one time and terrible the next? This kind of frustration can be the thing that keeps us out of the kitchen completely.
You may ask yourself why learning to cook seems so overwhelming to us today and yet was something that every woman learned to do 50 years ago before reaching adulthood. The answer is simple. We don't cook anymore. 50 years ago girls learned to cook because they watched their mothers and grandmothers do it from the time they were small. There is a lot to learn, no doubt and if you never saw your mom or dad make anything else but chicken nuggets in the microwave or mac and cheese from a box, it is certainly going to seem overwhelming!
But fear not. You can not only still learn to cook but also learn to LOVE to cook. I guarantee that as you grow in your food preparation skills you will find more and more satisfaction with every obstacle that you tackle. You will soon come to see that food is one of the greatest connectors to each other. You will see that food is a language that breaks down age barriers, gender barriers and class barriers! Good food is good food plain and simple and if you can create it and provide it, it will bring all sorts of people in to your life and connect you with them.
Don't misunderstand me. I know people are busy. I know you don't feel like spending 2 hours in the kitchen after working all day. In fact if you ask most chefs, they will tell you that when THEY get home they eat a bowl of cereal or a yogurt for dinner when they get home. I am certainly not so unrealistic as to think that people today will give up all of the conveniences of chain restaurants, fast food restaurants, and microwaves. All I'm saying is why not take a day a week or a even a day a month, gather your kids, your spouses, or even a couple of friends and indulge in some real time cooking.
 That is where we come in. Here at Utensils Cooking School, are passionate foodies. I have worked in the industry for 30 years and my husband and best sous chef is a foodie who loves to share the great taste and the experience of making food but we do realize that it can be too overwhelming to take on. In the weeks and months to come, we would like to here from you. Follow our blog and we are going to start a special section on cooking basics. We want to hear your questions about the very base part of cooking that you never really understood. Post them here and we will address them as thoroughly possible and we will give you the tools and needed confidence to give it a try on your own.
In a class I taught recently, the students were so surprised to see me seasoning my food several times throughout the cooking process with salt and pepper. As I salted and resalted, they cried out in horror but when it was all said and done, they understood that salting your food throughout the cooking process is what gives it the wonderful depth of flavors that they were experiencing out in restaurants but were unable to replicate at home.


The Superbowl/ Tailgate Party
A Romantic Intimate Valentine's Dinner
A Singles Night Out
Please check out our Facebook page for class schedules, cooking tips and pictures from previous classes. Please like us on Facebook and follow us here on our blog to keep in touch with us!
https://www.facebook.com/pages/Utensils-Cooking-School/175892409271467?ref=profile
Subscribe to:
Comments (Atom)